The Swan Station was so integral to LOST and my collection
reflect its importance. The Swan entry in The LOST Encyclopedia
includes "The Hatch", the station, as well as the related iconic elements
such as the countdown clock, the failsafe key, The Hatch Painting...
I decided to break down this post into sections that deal with the
different elements.
The Hatch
Inkworks LOST Season 1 Case Topper card
The Hatch Trading card holder by Paul Burrows/Room23Store
McFarlane Series 1 John Locke action figure stands
on top of the Hatch.
McFarlane Series 1 Diorama of the Hatch
"Down the Hatch" edition of LOST in Comics
by JJ Harrison
The Hatch can be seen in the foreground of "LOST" by Tyler Stout.
"The Hatch" by Kevin Tong was the eighth print released in
The LOST Underground Art Project, Series 1.
My print is #163/300.
Plans and Blueprints
This floor plan of the Swan Station was a bonus for renewing my
subscription to LOST The Official Magagzine a few years ago.
I recently purchased a set of
Dhama Initiative Floor Plans & Orientation Package
for Station 3 "The Swan"
from Paradigm Studios.
There are 8 sheets in the package,
each measuring 17" x 11".
The package is jam-packed with information.
Cover page
The cover page is embossed with a raised seal near the bottom.
Page 2 - Orientation Information
Page 3 - Upper Level Plan View
Page 4 - Lower Level Plan View
Page 5 - Station Arrangements
Page 6 - Island Map & Location
Page 7 - Dharma Iconography
Page 8 - Dharma Food Labels
Inside the Swan Station
"Mystery of the Island Jigsaw Puzzle" #1 - The Hatch
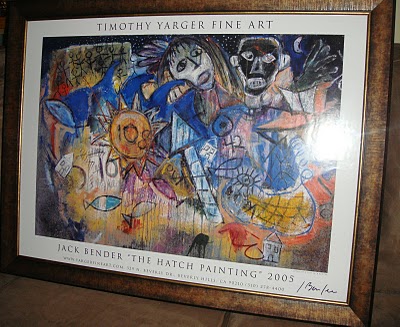
"The Hatch Painting" by Jack Bender
framed print from the Timothy Yarger Gallery exhibit
signed by Jack Bender
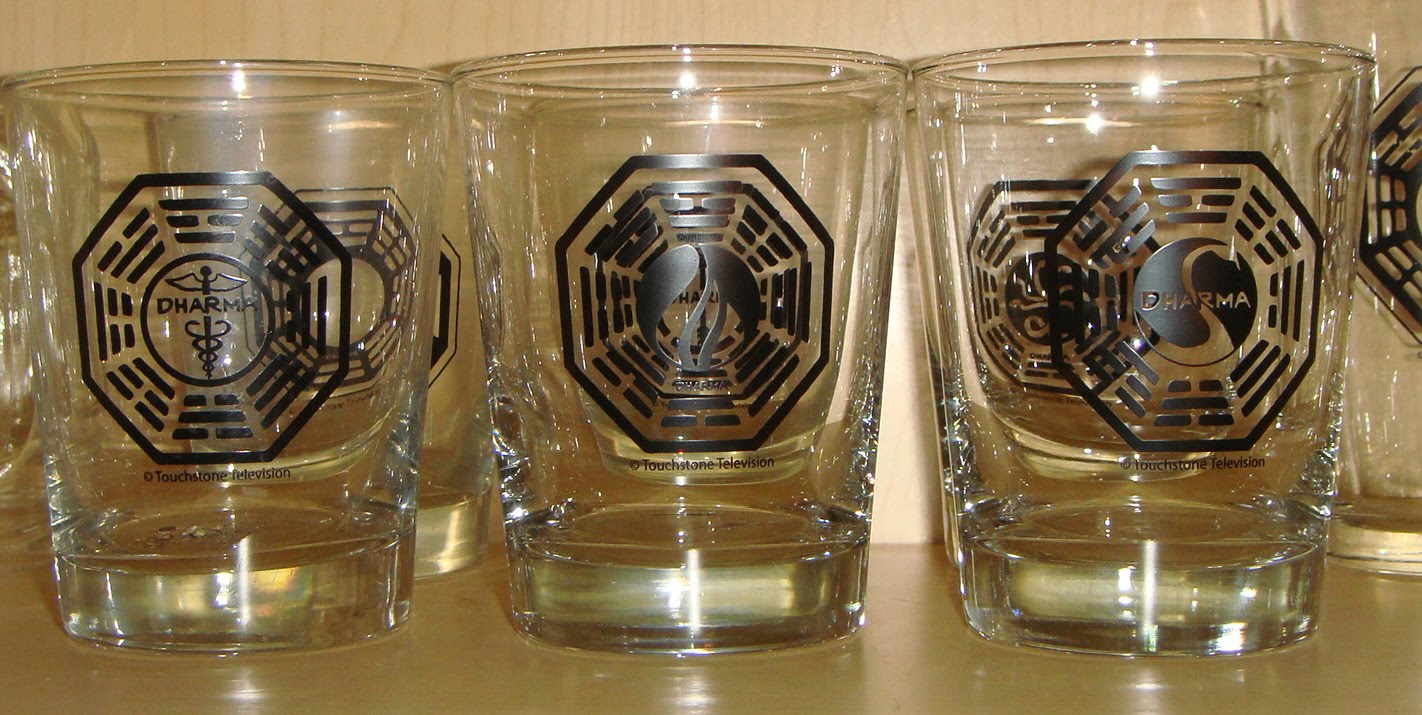
Dharma Swan Logo
The Dharma Swan logo is everywhere in my collection.....
The Patch
Glassware
Coasters
Key Fob
License Plate
Earrings (to be worn with my Dharma jumpsuit of course)
Shoulder bag from The Official LOST Fan Club Kit #2
Limited Edition Dharma Swan Mosaic #4/25
"LOST" by Olly Moss
"The Swan" by Rob Jones
was the 10th print released in
The LOST Underground Art Project, Series 1.
Dharma Swan Signs
Paper mache'
Multi-layer acrylic
Metal
...one of the crown jewels of my collection:
the Swan sign, made from carved styrofoam, hangs adjacent to
framed screencap from Season 2 episode of LOST.
Countdown Clock
Inkworks LOST Revelations Case Topper card
The countdown clock alsp appears on a 2009 calendar.
This mini banner displays the countdown clock on one side
and the system failure hieroglyphics on the other.
I usually display the banner on a garden flag post near my front door.
"LOST" by Olly Moss
displays the hieroglyphics in one of the fragments.
"System Failure" by drMikey
Fail Safe Key
There are two fail safe keys in my collection.
The first came with the Official LOST Fan Club Kit
It is displayed in my LOST shadow box.
The second key is an accurate prop replica
that hangs from my rear-view mirror.
A fragment of "LOST" by Olly Moss
features the fail safe key.